Sunday, December 6, 2009

Thanksgiving Turkeys

1st Grader's Turkey Picture

Well, even though Thanksgiving is over, here's a cute little project we did last year. I have a couple of examples included here. As you see, it's pretty simple. The student traces his or her hands, draws a background, and waterpaints the whole picture. I stress background details in my students' artwork. I like the neat little touch of the background fence.


2nd Grader's Turkey Picture

Thursday, December 3, 2009

4th and 5th Grade Snowpersons

From the names on these pictures I can tell we did these projects in 2007 and 2008. I thought that maybe the kids would see the activity as "too young." Some did. But many really enjoyed it did a great job. Others just didn't seem to get into it. I thought of it as a break from the more difficult things I had them do prior to this lesson. It's another one of those optional workshop activities to keep in the file box. I'll probably keep a version of it with that purpose in mind.

The Three Snowpersons project: Some kids took a lot of time and it seemed to take forever to finish. As I recall, they were a very talkative groups. My experience is that kids that chat during art don't complete a lot during the 45 minutes. That's why I now use the Seven Minuet Rule. (from a previous blog entry)

[I start day one with my "seven minute rule." I've written on this elsewhere on this blog but I'll briefly repeat it here. I use a timer, projected on the overhead screen, and expect the students to work for a full seven minutes with no talking. When the seven minutes is up, I set the timer to three minutes and allow students to use one of those minutes to stretch and rest their hand (and head) and then to continue to work but quiet talking and sharing is allowed. After the three minutes is up, I repeat the process. First, seven minutes of quiet work, followed by three minutes of a more relaxed time. Also, toward the end of the class time, I allow for quiet talking and encourage the sharing of work.]

The Single Snowperson project: Again, many kids did a great job while others didn't put much quality effort into designing their snowpersons. I was a bit surprised. I thought they'd really have a ball playing with this activity. Many did. But maybe not enough to call it a keeper at this grade level. I've posted a gallery of work where I put both the 4th grade work and the 5th grade work.

The procedure I followed for this lesson differs only slightly from the procedure I used with the primary grades. I still modeled the white painting process. We used wide brushes and I showed the kids how to use them to make their round circles by using the brush in a spiral motion. In one twist they could form each section. They did think that was pretty cool. I show some examples and then set them loose.

See the gallery pictures here. ;)

First, Second, and Third Grade Snowpersons :)

Most have likely have done some variation of this lesson. I share it because the pictures turned out so cute and it's one of the activities that the kids really enjoy during our brief snowy season. I tried this with all grades because I wanted to see how the older kids would handle such an activity. I'll post the 4th and 5th grade snowpersons next so you can see how they handled it. Here I offer 1st-3rd.

I like activities that give me opportunity to talk about planning, positioning, size, shapes, and the importance of adding details. Most art projects give the teacher opportunities to either introduce new concepts or reinforce old ones. Ultimately any art project is about the experience for the student and the level of self-expression they are able to bring into their work. I'll do this project again but as a choice at one of the workshops I'm dong in January.

This art project is rather simple. For the primary grades, I model the steps of the process (I do it, you do it). First we make a base using the white paint. Then we add the three "circles" for the body. Finally I have them make whatever type of snow flakes they choose. I encourage everyone to add snowflakes because it add character to the picture and appears more animated. A snowperson all alone can look rather dull. BTW, I'm not trying to be politically correct here. Someone always asks if they can make a girl snowman and so I try to say "snowperson" to let them know ahead of time that it's O.K. After the snowperson is finished and the snowflakes added, we put the pictures on the paint rack to dry.

During the next lesson we discuss adding details. I ask what a snow man or woman might wear out in the cold. I show many examples, (Google is a good resource) demonstrate a couple of things if necessary (how to add the vest or scarf) and then set them off to work. At first I just had the kids use paints but later added the fabric.

Here's a few more. And the web gallery can be found here.

Friday, November 27, 2009

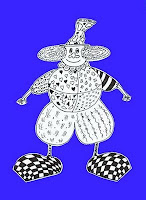
Second Grade Clown Drawings

This particular activity followed a series of lessons in the Monart Drawing Method. As the lesson progresses, I continually refer to the Monart basic shape families; Lines, Dots, and Circles. (see chart on right). The lesson idea came from Kinder Art.

(BTW, I will always try to show the source for lessons I share but in some cases I don't remember where I found the idea. Feedback in this area will be appreciated.)

I suppose there are many ways to approach this lesson. Here is my approach: One can use either an overhead projector, or a digital projector. I've used both. I demonstrate how to draw the clown (again, referring to the names of the shapes or lines I am using). I have found over the years that many students need that extra help when drawing. They either draw the images too small or too skinny or in some cases, say they can't draw at all. I model how to draw the clown but that isn't always necessary. However, I model only the basic parts (head, body, arms, and legs (shoes too)) and have them choose how to draw the hair, hat type (or no hat) and designs on the body. Some kids venture out on their own, others copy the details of the model. - Just as a side note, the technique for drawing the clown feet come from Mark Kistler's Draw Squad method.

After students complete their drawing (using pencil) I then have them outline their work with black marker followed by coloring with markers. For coloring this particular project, I have the students use a method I learned from one of the segments on the Donna Hugh Videos. (I'm pretty sure this is where I learned it but am not sure). The middle-school students use this same method and the art teacher calls it the Mr. Triplett Marker Method. Pretty cool.

The basic rule for coloring is that the students are to use all the colors on the color wheel. There can be no white left on the paper. I teach the kids that a marker is much like a paint brush. All the color is in the tip and that the students simply "paints" the color onto the paper. BUT, they are to keep their lines going in the same direction (for each individual section or shape). For example, when coloring the ground that the clown is standing on, choose either vertical or horizontal lines and lay one line of color down and then the next, and then the next, and so on. For shapes, outline the shape first, then choose the direction to color, and lay down one line at a time (don't go back and forth like one would with a color crayon or color pencil). Start at the top of the area to be colored, draw a line of color to the bottom, then start that exact process over again). You can see the technique in each of the clown drawings. For round objects I have the kids first outline the shape, and then color in a spiral following the round shape. I hope this explanation makes sense. Please ask if this doesn't make any sense.

After the pictures are completed, I have the students mount them and then they are displayed either in their rooms or outside the rooms. You can see student examples here.

In some activities of a similar kind, I have allowed for the backgrounds to be colored using colored pencils or crayons. Details are all colored in markers (using the above mentioned method) and backgrounds can be colored with crayon or pencils. It's a nice light background contrasted against the darker color of the markers.

What I like about activities like this one is that they gives me an opportunity to talk about design, overlapping, background, details, positioning, etc. Concepts about line and shape can be reinforced and principles such as repetition, patterning, balance, etc can also be introduced.

Thursday, November 26, 2009

Painting with tongue depressors and other stuff

I've been experimenting with a few painting techniques that I can teach to my students in preparation for the painting workshops I want to set up. I've gathered a bunch of different painting tools: tongue depressors, rulers, Popsicle sticks, combs, and an assortment of objects for making different shapes/lines, sponges, cardboard strips, and of course, paint brushes.

I found a picture on the Internet of cactus (google search) silhouetted against a sunset sky (image on the left-it's computer generated-Tuxpaint-it's free (see tuxpaint.org)). I'm trying to find techniques that kids can easily duplicate. The directions are simple: First, paint the yellow sun and then put down a line of red paint on the left side of the paper (I used a spoon). Add a few yellow and orange drops here and there on the paper and then using a tongue depressor, drag the paint from left to right. After that dries add the black foreground. I used acrylic black as the tempera tends to crack. The results are the image on the right.

I showed the picture to the kids to see what they thought of it. They thought it was pretty cool and then we moved on to the current lesson (see previous blog entry). On 4th grade student, Chris, painted his impression of the picture. Keep in mind that he only saw my example for about a minute. I was very impressed with his results.

Second graders were working with crayons (doing a crayon resist) and after seeing the 4th graders example (I was showing it off) one second grader decided to draw a similar picture.

Kids never cease to amaze me with their artwork. I can't wait to get the workshops all set up (am currently in the process of introducing color theory and having the kids combine colors to make their own secondary and intermediate colors. I'm also introducing the various techniques that can be used in the various workshop centers. I'll share some of the work (probably in January) that results from the creative craze I expect to see.

Happy Thanksgiving to all.

Sunday, November 22, 2009

Exploring Color

Last year someone gave me about 200 round vegetable trays. I had no idea how I would use them at the time, but as I began looking for a fun introductory lesson to color theory, I began to think about how to use those trays.

In the past I have used visuals (PowerPoint and color wheel) to show different color relationships. But I decided to start this year out by letting the kids just play with the primary colors and discover how many different color variations they could find.

To begin the activity, I set a few ground rules for behavior expectations (with an emphasis on cleanup behaviors). I gave a quick demonstration on how to use the trays and then laid out the procedures for acquiring materials and properly cleaning up at the end of class. Students were given a paint brush, tray, paper, water, and plenty of paper towel sheets. We used liquid tempera and I instructed the kids to put about 3-4 drops on three different sections on their tray (using only blue, yellow, and red). From there, the students used the remaining sections on the trays for mixing their colors. They were also asked to record their color discoveries on their blank paper.

As this was an exploration activity, the students could make "puddles" or "pictures." Most made puddles. All had fun.


Cleanup was a bit of a challenge. I have assigned specific tasks for table leaders (table leaders rotate each week) and then all student are responsible for the cleanup of their own tray and work area (including putting their work on the drying rack). Students wiped off the paint from the trays, and then used a spray bottle to add a bit of water and removed any remaining paint residue. Cleanup took about 8 minutes.

We have some basic cleanup rules: no wandering, clean your area and then help your table mates, put all materials back where they belong, sit at your table when you've finished your responsibilities. Only table leaders are allowed at the sink (I only have one sink). That rule has saved on many a log jam. I let students spray their hands with the sprayers and use the towels for drying if they insist on hand washing. I always emphasize personal responsibility in my classroom. The kids know that if I end up cleaning up their messes, we'll probably not repeat such messy activities. So far, so good.

Next week I plan on adding both white and black to the color selections and have the students explore tints and shades.

Sunday, November 8, 2009

Line Drawings

Finally. After getting sick and getting way behind, I'm nearly caught up with my classroom work. I've finally finished scanning the last of our line art drawings and have posted them on the web.

I love teaching art. I enjoy finding projects and seeing what the kids will do with the ideas. The first project we worked on this school year was line drawings based on art projects I saw on the excellent blog: Deep Sparkle. The drawings were actually finished about a month ago but I just finished scanning the last of the drawings. As I said in my last blog, getting sick put me way behind.

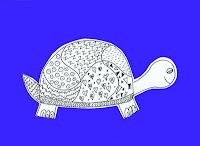
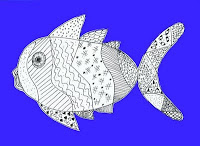
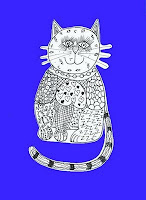
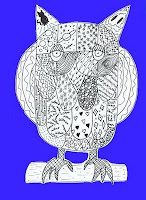
Line drawings are a good way to introduce and reinforce line and shape concepts. Through this activity, children learn a lot about the different types of line and shape, engage in planning, outlining, cutting and pasting, and mounting their projects. I followed the steps from Deep Sparkle's Turtle Drawings and Owls and Cats. All the project characters are modeled after these three ideas. You can see some student artwork here.

I modeled the outlines of each character for each grade level. I demonstrated how to create sections for each character and then together we brainstormed the many different line and shape types (geometric, organic, and free form). We make a huge chart of all possible lines and shapes we could use in our drawing. Students first drew with pencils and then outlined with thin Sharpie markers. All lines and shapes were drawn with markers only. Each section has to have the same line or shape within.

As with any art project/activity, this one touches on many of the art standards required by my State of Washington. When I return the art work to homeroom teachers, I try to include a list of those standards that were addressed. I include them here for those of you who might be interested. The project models below are teacher models.

1st grade turtles: Identifies and produces types of lines to create direction. Uses and produces horizontal, vertical, diagonal, curved, dotted, dashed, and zigzag lines to create shapes in an artwork.


2nd grade fish: Uses and produces different line qualities for a
variety of purposes. Uses and produces horizontal, vertical, diagonal, curved, dotted, dashed, and zigzag lines to create shapes in an artwork.


3rd grade cats: Produces different line types and line qualities to create detail in artwork. Uses and produces horizontal, vertical, diagonal, curved, zig-zag lines to create images. Uses lines to create patterns, designs, and textures in art.


4th grade owls: Produces different line types and line qualities to create detail in art work. Uses and produces horizontal, diagonal, curved, zig-zag lines to create a picture. Uses patterns, designs and textures and textures in art work.


5th grade: Produces different line types and line qualities to create detail in art work. Uses and produces horizontal, diagonal, curved, zig-zag, dashed, dotted, thick/thin lines to create a picture. Uses patterns, designs and textures and textures in art work.

Saturday, October 24, 2009

This the season to get sick.

We've finished our line drawings and I can't wait to finish scanning them and posting some examples. I encountered a bit of an interruption: the flu. Kids in my school are dropping like flies. Recently, one of my art classes had only 8 students. And even though I wash my hands constantly, the germs found me and knocked me off my feet. I missed about a week of school and am just now getting my full strength back. Oh the joys of teaching.

In the past two weeks the kids have been engaged in various activities in centers I've set up. Around Halloween I set up some drawing activities I call "Drawing with Ed Emberly." Emberly has some excellent step by step drawing books that are centered on the Halloween theme. The kids draw bats and cats, ghosts and goblins, skeletons, haunted houses and many other spooky things.

Another center is really quite simple. I drew some Halloween pictures on 9x12 tag board and then traced the lines using glue. After the glue dried, they made excellent crayon rubbings. I have rubbings for ghosts and bats and pumpkins and cats (and others). I use this activity to expose the kids to the effects of using complimentary colors. I instruct students to choose a color for the rubbing (using crayon), and then using the color chart, find the colors complimentary color for the paint wash. It's pretty simple and they won't win an art award. But the kids have fun and it gives me another opportunity to talk about the color wheel.

I also set up two tables for painting where kids can free paint (painting whatever they like just for the fun of painting!) or they can choose the crayon rubbing activity. Also, I provide orange construction paper and have step by step instructions for drawing Bert and Ernie pumpkins. Other students use the Orange paper and draw a large pumpkin on it.

When I set up the clay center it's always a big hit. I usually need two tables for clay (non-drying kind) and just let the kids create. We have a display table with the following rule: When I need more clay, the older clay forms on display get "smashed." I try to take pictures of all the creations and run a slide-show of all the work the following week. The kids always love this part.

I'm always glad when the Halloween season is over with. The kids are always a bit pumped up during this time and the final few days before Halloween can be very challenging. During this crazy time of year I focus mainly on routine (how to manage oneself during center time for example). I do however manage to slip in some skill/concept teaching when their not looking. ;)

Friday, September 18, 2009

Now that school is well under way......

I'm ready to begin posting again and sharing some of the ideas I'm using in my classroom. For the past two weeks, my students have been busy finishing up work on their portfolios/folders. In past years I began the year teaching Ed Emberly's drawing alphabet, Monarts family of shapes, and Mark Kistler's Draw Squad concepts. I will still cover these drawing ideas with my students, but this year my approach will differ. I'll begin the year focusing on the elements and the principles of design. For the next few weeks I'll be introducing and reviewing the elements of design with all classes. I plan to focus on line and shape first, and then introduce and focus on the other elements (the principles) as the weeks progress. Then it simply becomes a matter of repetition and reinforcement and encouraging a class culture that builds on this knowledge through meaningful creative experiences.

I also want to experiment with TAB (Teaching for Artistic Behaviors). I have some ideas for my first centers (based on line, shape, and color) and my plan is to spend a few weeks teaching with direct instruction and guided practice, and then designing centers where students can make choices and creatively interact with the art ideas previously presented.

I still want to teach many whole group projects as they are proven favorites and offer unique art experiences (such as painting with colored chalk, getting interesting textual effects using cellophane among others). Clearly, there is more than one effective instructional method. I've been very successful teaching art using the teacher directed method. And once a set of skills and procedures has been learned and practiced, I've let the kids go and create using their own ideas. (I call those open-ended activities "Free Draw" or "Free Paint" activities. It simply allows for students to either draw or paint things that are of interest to them. I have a set of "Free Draw" books - step-by-step - that children use for drawing. Free Painting is usually a time where kids just paint for painting's sake.)

This year I'm going to try to design some centers that will follow a series of direct teaching experiences. The centers will build upon the concepts taught in the whole group lessons and allow for students to experiment with the ideas they recently learned. My room is pretty small so I'm not sure how well this will work. I have one sink, and 5 tables. There is very little room to "squeeze" around the room but it's doable. Picture a room that has 5 tables and one supply area. That's all the room I have to work with and it's part of the reason I've been reluctant to do centers in the past. As I find out what works and what doesn't, I'm sure things will change a bit and I'll work out the wrinkles. Wish me luck.

In addition to blogging about my experiences with these ideas, I have developed a website to host student's work. In addition to sharing things I'm doing this year, I hope to continually add ideas that I've used and found successful in the past.

Thursday, August 27, 2009

Teaching with Love and Logic

Today was my first day back at work. We had one of those "Teacher Training" days and I always find the time we spend together as a staff to be both exciting and motivating. In the morning we had a brief meeting, and then, in teams, we hopped into our cars and went on our first grade home visits. Each incoming first grader is visited by a team of teachers, given a small packet containing a book to read, information about school and upcoming events, and a few other items that would interest a child of that age. After that we had lunch and then spent the remaining afternoon with a refresher course on the Teaching with Love and Logic principles.

When I was first introduced to the Love and Logic principles, I was immediately attracted to its simplicity and sensible approach to classroom management. Although there is much that could be said about Love and Logic philosophy, I believe they are encapsulated in the four following principles.

1. Build Relationships: The most powerful thing a teacher can do to effectively manage his or her classroom is to build a meaningful relationship with each student. Get to know their names quickly. Learn something about each student. Notice them and acknowledge. Greet them each day (meet them at your door). Smile. Be sincere. Ask them questions about things that they might find interesting. Use positive body language including safe and gentle touch (side hugs with younger students, high fives, other appropriate touch with older students). With the older boys, I like to give the shoulder bump (like the football players do except I do it softly). Show interest in your students.

2. Show Empathy: We all make mistakes. When a child is frustrated, or hurt, show empathy for the child by acknowledging their feelings. Saying things like, "That must be frustrating." or "You look upset." or "Ouch, that must hurt." shows students you care about how they feel. These are statements of empathy. Say a child is running through the hall and slips and skins his knee. Rather than say, "That's why we walk in the hall." you could say, "Looks like you skinned your knee. That must hurt. Let's go to the nurse and have her take a look at it." Then later, after the child has had time to consider the consequences of his actions (running in the hall) you might say, "How's is your knee doing?" (show empathy) "Have you thought about what you could do differently so that you don't get hurt again?" Most kids have already figured that out.

3. Offer Choices: When a child is acting up and you want the behavior changed, give reasonable choices. Keeping the principle of empathy in mind, acknowledge that the student looks frustrated (or mad) if appropriate. If the student is just acting out, ask if they can pull it together of do they need to go to the back of the room (or across the hall) and pull it together there. Make the choices reasonable and non threatening. (In Love and Logic, you don't always have to give choices. If a strong relationship has been formed, that alone may give you enough of a bond between you and that student to ask for compliance. "Do that for me will you? Thanks." Turn and walk away - assume the student will comply. Most often, they will.

4. Use Enforceable Statements: An enforceable statement is one that you can actually enforce. It's what you will do, not what you expect the students to do. For example, "Turn in your math books to page 14 and look at problem one. We'll start there. I'll begin the lesson in thirty seconds." When the thirty seconds is up, begin the lesson and notice those students that haven't followed through. Walk toward them but continue teaching. As you approach them, most students will magically find page 14 and get on task. The enforceable statement, the one in italics, is one you can enforce. Be sure not to say it unless you can actually do it. Always follow through.

Love and Logic principles also include the ideas of avoiding getting sucked into arguments with kids, delaying consequences until you've had time to reflect what's appropriate for the situation (which also give the students plenty of "think time), and a plethora of other great ideas on relating and dealing with students in one's classroom. The above are really small snippets of a much larger picture. If these ideas are of interest to you, find out more by visiting the Love and Logic website.

Happy Teaching.

Wednesday, August 26, 2009

Student folders

When the school year begins, it's time to get to know the students, set the boundaries, establish routines, and find that assignment to start the year off right. Since I only see my students every 6 days (counting weekends) and only for 45 minute periods, time is a precious commodity. When the students show up on their first day with me, I get right to work. Boundaries, routines, expectations, and "getting to know you" engagements can all be done in the first few class meetings. I go over boundaries and routines etc as the opportunities arise. Brain reserach tell us that students can handle information in small doses and not in large chunks. So I introduce only those routines that are necessary for that day.

The first assignment is simple" Students are given an 12 X 18 piece of white construction paper. They are told to fold the paper in half and on what would be the front, students place their name (first and last) and the teacher's name on the bottom of the front cover. Then they are to place the words "Fine Arts" somewhere on the folder (I suggest the top but it's only a suggestion.) Then they are instructed to illustrate the folder any way they want. I show some examples, offer some ideas and themes, and give them a time limit (must be completed by the second day of class).

I start day one with my "seven minute rule." I've written on this elsewhere on this blog but I'll briefly repeat it here. I use a timer, projected on the overhead screen, and expect the students to work for a full seven minutes with no talking. When the seven minutes is up, I set the timer to three minutes and allow students to use one of those minutes to stretch and rest their hand (and head) and then to continue to work but quiet talking and sharing is allowed. After the three minutes is up, I repeat the process. First, seven minutes of quiet work, followed by three minutes of a more relaxed time. Also, toward the end of the class time, I allow for quiet talking and encourage the sharing of work.

You thoughts? Here are a few examples of student folders. The images aren't the best but they will give you the idea.


Art Folders and assessment philosophy.

In my previous post I wrote the following concerning assessing the arts:

How does one measure attitudes, self-confidence, self-discipline, a sense of accomplishment, or the development of a student’s neurobiological system? A highly structured arts program complete with a highly structured assessment can’t accurately measure these things. And if the arts are highly structured, there is a danger that individual expression may diminish or be completely lost. Many students will turn off to the arts. This is the exact opposite of what we want to accomplish through the arts.

(I should say from the start that I'm really talking about the report card grades here and not the grades of each individual assignment. While I do grade some assignments, I only do so for my own personal record keeping. I'm more interested in celebrating work accomplished and hearing what students says about their own work, what they like about their work, why they chose the colors they chose, or whatever their thoughts are when reflecting on completed work. In my view, at least at the elementary level, the worst thing to do is to grade each piece of work. Some students already have the "I can't do it" attitude and it seems to me that assigning grades to each assignment would only reinforce that attitude in some students.)

I've always struggled with assessments in visual arts. I don't like attaching a "grade" to a child's artwork. I'd rather simply grade according to a student's attendance and class participation. In my view, the skills students possess in the arts aren't as important as their level of engagement. If, for example, a gifted student slacks off, but produces work that is above that of his/her peers, in most systems they could still get a good grade. Conversely, a student who is fully engaged in the art assignments, displays a positive attitude, but lacks the skills to produce exemplary work, might not receive a good grade, despite the hard work. But which is a more important attribute: natural skill or a good work ethic and positive attitude?

I don't have the luxury of using the “pass/fail” approach that Jensen's suggests as a better way to assess the arts. In the system I must use, the grading is on a scale of 1-4. A "3" is given if the student is meeting the State standards for that grade level.

Using this system for recording grades, my approach is very simple. During the first two class meetings I have the students take an 11x17 piece of white construction paper, fold it in half, and use that "folder" to put all their class assignments and sketches in. I try to do a quick assessment of each child's work as they are completing each project. I do this during class. I also review their folder work and do a quick visual assessment of their work.

There are a few specifics I am looking for when assigning a grade. Did the student complete the assignments and exercises in class? How well did they follow the instructions given? Did the student demonstrate a level of understanding of the concepts being learned? I try to follow Jensen's suggestions for the "pass/fail" approach even though I'm giving a numerical grade.

The criteria for pass/fail are simple, straightforward and reachable by all students. Students must have good attendance in class, participate in the class activities, develop a portfolio of their work, get portfolio feedback via peer sharing as well as other ideas listed by Jensen, and participate in a student/teacher conference.

A portfolio of a student's work (or "Folder" as I refer to it) will tell you something of a student's attendance - missing assignment pieces is likely due to an absence (I don't keep records of attendance as it is just one more thing to track) and certainly will tell you their participation level in class. The portfolio, along with class observations, will give you enough information to assign fair grades.

One drawback to the numerical grading system is that nasty little "skills and concepts" box. Some students clearly are above the line, and some below. Where students clearly fall below the line, I grade accordingly. Where students clearly rise above it, I grade accordingly. I rarely give out "4's" or "2's" except where it's completely clear that under "skills and concepts," that's what the student deserves. Visually, the 1 - 4 grading continuum looks like this in my mind:

1-1//2---2//3-------------------------------------3// 4---4

All points on the grading scale are not equal in my view. Most students will fall under the "3" as it is the largest area. Few fall under the "2" (below grade level) or "4" (above grade level) and even fewer under the "1." To get a "1" in my class you'd have to show up and do nothing (and I've had a few students like that!).

I hope someday that the grading for the arts will more accurately reflect the long term goals of the arts and not simply reflect some need for accountability. Until then, this is the system I use, flawed as it is. In review, Jensen offers these three ideas to include in assessing the visual arts:

1 Have good attendance in class

2 Appropriate participation in the class activities

3 Develop a portfolio of their work and get portfolio feedback (from peers and instructor)

As always, I would love to hear your ideas on the thoughts I've presented.

Friday, August 14, 2009

Assessments

Jensen states several times throughout the book that the arts are not “efficient.” He means that the benefits are not immediate – they are seen in the long term. Art is a creative process. It’s a personal experience and it’s a meaningful way the artist can express him/herself. The arts help in the development of the brain and the benefits to our brain development happen over time. How does one measure attitudes, self-confidence, self-discipline, a sense of accomplishment, or the development of a student’s neurobiological system? A highly structured arts program complete with a highly structured assessment can’t accurately measure these things. And if the arts are highly structured, there is a danger that individual expression may diminish or be completely lost. Many students will turn off to the arts. This is the exact opposite of what we want to accomplish through the arts.

Assessing creativity poses many problems. Creativity is highly individual. To focus on the grading of artwork is, as Jensen states, to devalue learning and minimize creative expression – the very things we want to enhance in our students. If students think they have to “pass a test” on say a particular drawing or painting or musical composition, they will focus on the wants of the teacher and not on their individual form of expression. Students will care more about what their teacher thinks of their work than focus on the sheer joy of the art experience itself. After all, that is a huge goal of the arts: the joy of personal expression through various art forms.

Jensen proposes a better way of assessing the arts through a “pass/fail” approach. The criteria for pass/fail are simple, straightforward and reachable by all students. Students must have good attendance in class, participate in the class activities, develop a portfolio of their work, get portfolio feedback via peer sharing as well as other ideas listed by Jensen, and participate in a student/teacher conference. Such an approach allows the student to reflect upon his/her work and helps created an atmosphere of trust and artistic freedom that encourages individualism in each artist. Reviewing a portfolio with students is also a way to celebrate the student’s work.

After reading this chapter, I believe I have been on the right track with respect to assessment in the visual arts. There are some weak areas that I need to address but overall I find myself applauding Jensen’s ideas.

I’ve always had students make a portfolio that contains samples of their work. But I don’t think I carry this idea far enough and would like to follow more closely Jensen’s suggestions. For one, I’d like to give students more say in what goes into their portfolio. And, since I have over 400 students, I’d need to figure out an efficient way to hold some student/teacher conferences – I see great value in having them but am not sure how to manage the logistics with so many students. I'd like to offer more time for students to share their portfolio work with their peers not only get valuable feedback of their own work, but to learn from the ideas of others.

I’ve always resisted any formal assessments in the visual arts. Observing my students while they are working, and viewing the work in their portfolios gives me some idea of their skill levels and more importantly, their commitment level to the class art activities. An added step would be conferencing with students about their work.

I’ve participated in art shows before, but never had one of my own. I’m thinking of exploring this idea with the music teacher and see if we can come up with an idea for an art night. The music teacher has a group of choir and mallet musicians and together with visual art displays, we could make a fun and informative night for parents and students where they get a chance to share and celebrate in the student’s work.

A final note: I’ve asked my principal to read this book over the summer. Perhaps there isn't enough of an emphasis in the arts in schools. Individual classroom teachers either feel the art specialist covers the art needs for their students, or there simply isn’t enough time for them to do art, or they don’t feel competent in the area of art. Considering that administrators often claim over and over that teaching should reflect current research, it seems that we ought to be putting some of our staff training time into the area of arts considering its value. We spend most of our time learning about reading and math or science. In my ten years as an art teacher, I don’t think we’ve ever had even one art in-service day. Maybe I can help to change that.

Final note: with this post, my series on Jensen's book ends. I'm currently reading his book, "Teaching With The Brain In Mind" and perhaps I'll share some of my reflections when I'm done.

My next series of blogs will offer up some of the ideas I've used in the classroom. I hope you will stay tuned and that you will find some ideas you can use in your own classroom.

Dan

Settling Time

Settling time is a time where there is a break from academics so that the concepts taught have a chance to "settle in." It's a time for the brain to reflect and organize what has just been taught. Students need to get small chunks of information, and then given a "settling time" for that information to be processed.

The author points out that 1st grade Japanese students, many who score better than some US public school students, actually spend less time in school than their US counterparts. While the Japanese students undergo intensive instruction, they have twice as many recesses and have shorter school days for their youngest students. More time is allowed for peer play at home, socialization, and other activities (such as music lessons). Time well spent.

In one of our trainings the instructor said that 7 minutes is typically the amount of time that people are able to focus intently on a given thing before they need a bit of a break or change.

I've been using the 7 minutes idea in my classroom during the last few months of the school year.
I now try to deliver my lessons in 7 minutes segments. I don't give directions for longer than 7 minutes without some sort of break. I try to move things along so that my instructional time is shorter - then take a few questions and if clarification or more instruction is needed, I go from there. The kids had been very talkative most of the time bug since I've been using the "7 minutes" the work productivity has gone way up. Here's the approach I use: I have a timer on my computer and I project the image on an overhead screen. I tell the kids that for 7 minutes there is to be no talking and no questions (unless of course they need information to continue working). After the 7 minutes, I give them 3 minutes of a more causal work time. They can take at least one min to stretch, relax (especially helpful if we are drawing or coloring) shake loose their tired hands, and talk casually to people at their tables. They can share work and ask questions at this time too. They are to keep working but it's not as intense as is the 7 minutes. If after 7 minutes of instruction time, I encourage students to discuss what they just heard from me. During individual work time, I allow for quiet talking and sharing of work and ideas.This seems to be working. I have fewer management problems using this approach. The kids seem to like the timer as they know they will get a break and they know when it's coming.

Timers I use:

Online Timer


One to download (I mainly use this one - it's the same timer used by the instructor in one of our school trainings. (direct download here: screentimerpc.zip )

Reflections on the importance of PLAY

There are many aspects about play that make it valuable to the learner. With play, there is a casual and relaxing element to it. It's a fun way to "let it out" and freely explore ideas with no pressure to perform. In playful activities, there is a safety net. We can experiment and mistakes are not that important. Mistakes teach us the wrong way something is done and allows us to learn through experience. Play allows us to be free in our expressiveness in non-threatening ways. It's a natural way that children begin to learn social skills and conflict resolution. It is especially good for emotional development.

I ran a play-centered kindergarten for 8 years. The core philosophy was that children at that age learn best through play. I still see great value in play at all age levels. Like many teachers, I'm under some pressure to meet State standards. As a professional, I need to find the balance to meet my employer's expectations, while at the same time, making sure I meet the collective needs of my students.

I try to find many opportunities for play centered activities in my art class. Through the year, I have many sessions where I let the children "play" with the ideas they have been learning in class. When painting, I call it "free painting." Children are allowed to paint what they choose, mix colors, experiment with different painting tools (we've used cardboard, tooth brushes, q-tips, straws, and a few other objects as well for painting activities).
We also have "free draw" activities. It's a time where children can experiment with the drawing concepts they have been learning, create something on their own, or use one of the many step by step books I have in my room. At the end of the year I always set up a variety of centers (straw painting, marble painting, construction art, drawing, pastels, clay, and others) and children can choose which center they want to work at. It's always a favorite time with the kids and a time where I have the fewest behavior problems. It's messy, but fun. Throughout the year I also sing, tell jokes and try to allow for movement in my room (the room is small - about 1/3 the size of a normal classroom. My goal is meaningful learning in a fun way.

I'd love to hear your thoughts on the importance of play.

Reflections on the kinesthetic arts

I have just a few more entries to share on Jensen's book, Arts With The Brain In Mind. The final posts will cover reflections on the kinesthetic arts, the value of play, something Jensen refers to as "settling time," and thoughts on assessments in the arts.

Blogging is a good way to process one's thoughts or share ideas and experiences. For me, writing about Jensen's book has helped me think through some of his ideas. Last school year I took an online course using Jensen's book as our text. Most of what I've written comes after reflecting on the ideas Jensen presents in his book.

After I finish the next four entries, I'll begin to share some of the art projects I've used in my classroom. I hope to include a gallery of student work, lesson plans, resources, and ideas on how to tie in the lessons to the Washington State ELARS. See this link for my view on the State's learning goals and how that fits into my philosophy of art.

------

The Kinesthetic Arts: Involving students in intricate and sometimes original movements as a means to activate the brain. Again, reflections from Jensen's excellent book:

Most of the brain is involved when students engage in highly complex and novel movements. The brain goes on alert, stays focused, is "on the lookout," and with many areas of the brain activated, students can handle multi-sensory input. Jensen points out that athletes that achieve excellence in sports are likely using close to 100% of the brain. When the body is involved in complex actions, multiple systems in the brain are activated. This brain activation does not operate this way with traditional seat work. Active learning, learning that involves multiple systems, leads to implicit learning. When students learn from experience, the learning runs deep. Such learning awakens a better understanding of concepts, many of which are stumbled upon accidentally.

While my main focus is on the visual arts, there is much to be said about the benefits of the kinesthetic arts. Participation in the kinesthetic arts stimulates implicit learning. Implicit learning, or hands-on learning is more effective than explicit text-based learning because it involves more area of the brain in the learning experience. It's active learning and shows greater effects than explicit learning. I've explained to my principal that in my art class, many things are taught, more is caught. Implicit learning is caught learning - learning by experience, trial and error, experimentation, and asking the "what if?" questions.

To explore these ideas further see the following links:
Excerpt from the kinesthetic arts chapter of Jensen's book.

Minds in Motion: A Kinesthetic Approach to Teaching

Bodily-Kinesthetic Intelligence

Thursday, August 13, 2009

Art With The Brain In Mind: benefits of an arts education.

Many school districts throughout the Country are experiencing budget issues. When cuts are made, it's often those programs that are the least valued that are eliminated. Perhaps I'm wrong on this next point but it seems to me that the arts are most often the first programs targeted for cuts. Cutting the arts out of the school curriculum is like cutting one's hand to spite one's face. Research is clear that the arts are invaluable to a well-rounded education. Some research strongly suggests that students who participate in music and visual arts programs do better in other subject areas than do students who don't participate in an arts education. Additionally, many students who don't do well in other disciplines, shine in the arts. For many students, the visual arts can significantly contribute to their motivation, work ethic, and self-discipline.

We've all known students who might not otherwise have a strong commitment to school and learning but, are motivated when it comes to the arts. Often that motivation can encourage students to stay in school, and even to excel as they develop a strong desire to learn and participate in the arts. According to Jensen, students who might normally drop out of school, will stay in school rather than drop out providing there is an attractive arts program available to them.

I have some art students who don't always do so well in their regular classroom. They either have academic struggles or issues with peer relations. Many of these students seem to excel in visual arts. It's not that they are gifted, it's that they seem to really enjoy the process of creating. I have observed many "problem" students work quietly and focus on the task. Others can be off task around them, but they stay focused. It's like they are captured by the art activity. A couple of my former students were known for having behavior problems in their regular classroom. But when they come to the art room, it's like they change into a new student. They are focused, creative, and have a positive attitude toward their classwork. Often they will bring in art work that they created on their own at home.

To explore these ideas further check out the following links. Also, your thoughts and comments are always appreciated.

Arts in Education
Americans For The Arts

Learning Through The Arts
Teaching Basics Through The Arts by Mona Brookes

Wednesday, August 12, 2009

A quick thought on mind mapping. More thoughts on Jensen's book.

When Jensen talks about the visual arts, he speaks about the "doing" of art in a continuous way. Unfortunately, for the most part, I am the only formal art the students get. I suspect this is true in many schools where there is an art specialist.

I only see students once every six days. But as I read Jensen's book, I began to recognize that regular classroom teachers often do a visual art activity but often don't consider such activities "art." For example, the use of mind maps is standard in our building. And teacher's often have students do illustrations with reports (like in science experiments) or other writing assignments. I've noticed that many of the mind maps are very detailed and great visual representations of their ideas. What I'd like to suggest is that classroom teachers often do much more in the way of visual arts (visual representations) than they realize. Perhaps Jensen is really on to something with respect to mind maps. They can be quite detailed, are often color coded, and are visual representations of thoughts and ideas. The parts of the brain that are engaged in the creation of a mind map are those same areas that are ignited during other visual art activities.

Something to think about. I'd love to hear your thoughts on this.

More thoughts on Jensen's book. Doodling

I've always been a doodler. When attending meetings, or as a student in school, I doodled in most classes. In his book, Arts With The Brain In Mind, Jensen suggests allowing students to doodle during class. More than that, he seems to be suggesting that teachers ought to encourage doodling, illustrating, and mind-mapping during class as a way to better reflect on the student's learning. I think this is a good idea.

I think doodling can help in a couple of ways. Doodling is one way to give a visual representation of what is being learned. But more importantly, drawing/doodling engages our brains - and wakes them up. Rather than distract us from learning, it may serve to help us better concentrate on what's being taught. Doodling can not only help visual learners keep focus, but it can help kinesthetic learners too. It's not so much the visual aspect that's at play here, but the fact that of being engaged in a physical activity that helps students focus and concentrate.

I particularly like this doodling idea of Jensen's because as a visual learner, I've always used symbols and drawings to help me in my learning. I've even developed my own codes in musical notation that remind me of certain guitar licks or musical inflections when I'm learning a song. If I can create a visual of something, I can usually remember the thing that it represents.

The brain is an interesting and marvelous thing. I suppose some will be a bit tentative in allowing students to doodle during lessons. But it's something to consider. Often, students get lost in day dreams. When that happens, we have lost them - they are "someplace else." But with doodling, the brain is engaged, alert, and receptive. Just the very thing we want in our students when we're teaching.

Your thoughts are most welcome.

Thursday, July 23, 2009

The Art of Music-more thoughts on Jensen's Arts with the Brain in Mind. Part II

Engaging in musical activities, either through the playing of an instrument or simply listening to music, can help in the development of areas of the brain that affect our moods, motivation, and in general, the way we relate to the world. Music can help motivate us, lift our spirits, help us relax, and increase our appreciation of the beauty in the world. Through music making we reflect and ponder ideas, become creative in our thinking, and invent new ideas.

Studies show that music can have therapeutic benefits. It improves awareness of our emotions and helps us to manage different emotional states. Music can help us get in touch with our inner feelings, increasing our self-awareness. Self-awareness can help us as we cope with a wide range of emotional situations. We need to learn to recognize our own emotions and be able to manage them effectively. This in turn helps us to recognize and appreciate the emotions of others and to effectively manage our interpersonal relationships. Music instruction enhances our emotional intelligences and help spark the neurological connections that affect our emotional intelligence growth.

Another benefit of music instruction, indicated by another study cited by Jensen, is that social skills can be enhanced through musical instruction. The development of social skills is critical to school age children and musical instruction can help in this important development. It has been shown that background music can increase positive peer interactions among students. It can help students relax and that in turn helps students be more successful in their social interactions. Positive social interactions can lead to a host of other positive benefits. The development of our emotional and social skills are an important part of our everyday lives. And music has a positive affect towards the development of those skills.

Your thoughts on these comments are most welcome.

Tuesday, July 21, 2009

The Art of Music-more thoughts on Jensen's Arts with the Brain in Mind.

Even thought this blog will mainly focus on the visual arts, I want to talk a little on the importance of music education and its inclusion in every child's education experience. Music education has a proven track record in helping to develop the maturing brain. Children should be given consistent and frequent opportunities to explore music through listening, singing and individual instrument lessons.

Music education and training offer great benefits to an individual's intellectual development. Yet it's a fact that is easy to overlook. The US education system seems to ignore past and current research regarding the benefits of a well-rounded education in the musical arts. Perhaps the fact that its importance is overlooked or downplayed is because the study in the the arts take a long while to reap rewards. A talented musician can spend years at study before the fruits of his/her labor is realized.

Much like language learning, music learning has developmental periods. Like the learning of language, these periods arrive very early in a child's life. That is not to say that people can't benefit from musical instruction later in life, but the fact is that the earlier children are taught music, the better. These developmental periods are more like temporary open windows which suggests that early music education is critical for a child to reach his or her full potential.

In his book, Arts with the Brain in mind, Eric Jensen suggests that one can begin to "play" a music instrument even before the age of 5. This is because before the age of 5 there exists a critical period for somasensory development (via musical instruction). Clearly, the home plays a significant role in a child's musical education. If by age three children are ready for simple keyboard practice, at least having musical instruments in the home will invite exploration and experimentation (through play) and prepare the child for eventual formal lessons.

With regard to music lessons, Jensen's suggests, "The sooner the better." I have two young grandchildren and they are 2 and 4 years old. When they come to visit my wife and me, I make available musical instruments for them to strum and bang on. In their home there are several instruments as well. I began playing piano as an elementary student. I also played clarinet throughout my school experience and today play guitar and other stringed instruments. Of all the musicians I've met in my life, the ones that are the most proficient are those that began playing at a very young age.

Jensen points out studies that show 9-year-olds have the ability to hear and comprehend music even when no music is playing. The brain itself is giving meaning to musical ideas and sounds and forming musical compositions. One author (on an Internet article on audiation) says that this skill is analogous to thinking in a language.

What can art educators do with these facts about musical education? I'm a great believer in playing background music during art work time. Jensen has a book that lists nearly 1000 tunes to use in a variety of learning situations. Top Tunes for Teaching can be found on Amazon.com as well as other book stores.

Jensen suggests that background music should be predictable (but this maxim is different for creative expriences--see more next paragraph). He suggests jazz instrumentals from musicians like George Bensen and Kenny G. Environmental music such as a running river, rain, or the ocean surf, combined with soft musical accompaniment is recommended as well. Baroque music works well too and Jensen suggests it be in a major key, done with orchestras (as opposed to individual instruments), and the movements must be adagio or andante. Here again balance and predictability are the key to effective background music. Some good suggestions for background music include Bach's Branderburg concertos, Handel's Water Music, and Vivaldi Four Seasons.

I stumbled upon a website, http://www.kaganonline.com, where they sell CD's that are specific in creating particular moods. On the one hand, general background music should be predictable. But Jensen says later that for creative stimulation, the musical type differs from the predictable kind.

Gary Lamb of http://www.garylamb.com/ has a collection of CDs that he's authored (which he sells at KeaganOnline). They are tailored for specific learning situations. His Music for the Mind series is for classroom use and I just bought two of them in that series (for creative stimulation). A third one I bought, Twelve Promises, falls into the category Jensen suggests on page 27 of his book. It's a jazz album with piano, guitar, and violin. Although I've used background music before, I've not picked specific music for a specific learning purpose. I've usually just played classical albums (lots of Motzart). I'm excited to try these out and see how the children respond.

I ran across a link just the other day on the benefits of integrating the musical and visual arts. I'm exploring this idea further and when I have something good to share, I will write more on that idea. If you have any thoughts or ideas on what I've said here, I would love to hear them.