
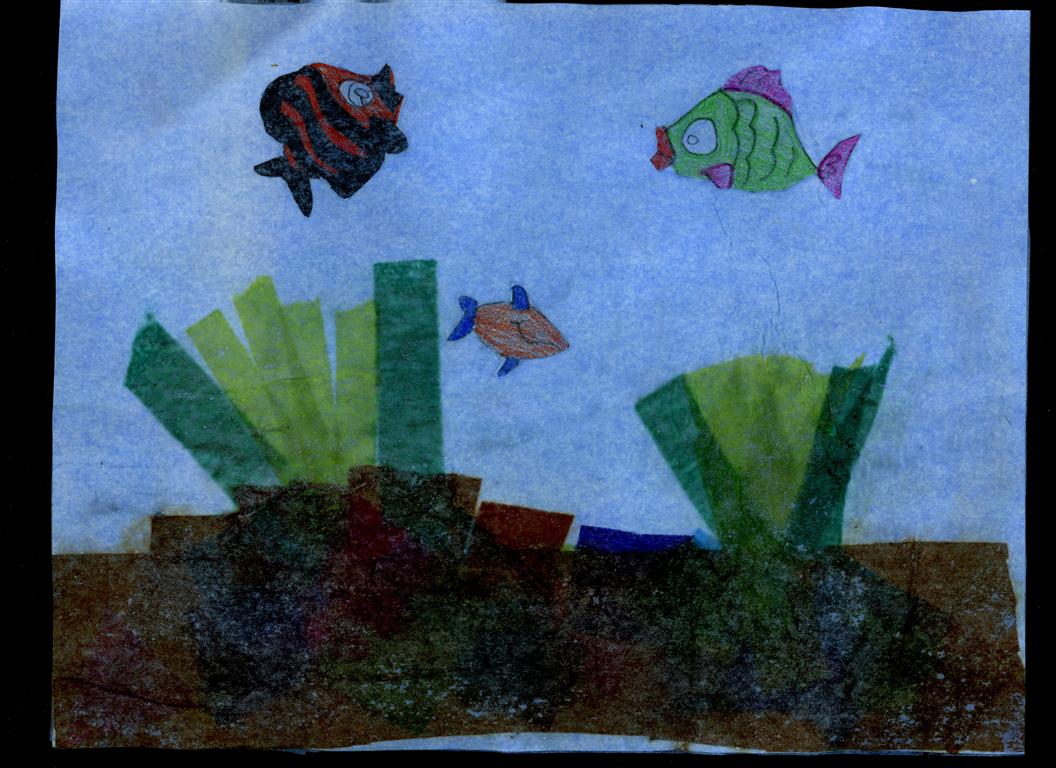
 This project was a lot of fun. The kids really enjoyed it and so did I. The idea came from another collage project I was doing with the 4th graders. I love tropical fish scenes and this idea was both a fun and easy way to create a simple
 underwater scene.
Starting with a white piece of paper, I had the students glue down different pieces of tissue paper (about the size of a dime - little torn pieces) at the bottom of the paper. They glued various colored pieces of tissue down to resemble the colorful coral. Then we covered that with a long strip of brown to represent the bottom. Doing this again, I'd add the colorful coral on the top of the brown and maybe even experiment with extending it above the top of the brown layer. We then added several strips of green tissue on both sides. Our pictures were ready for the fish.
One could go through magazines and find pictures of fish but it would be hit and miss. So I created two sheets of fish pictures, one  with fish swimming to the left and one to the right. The students were instructed to draw (not trace-though some did just that) three fish, two going in one direction, one in the other. We talked about where to place the fish and I suggested the open space in the middle of their project. When the fish were drawn and colored properly, the students cut them out and then glued
  them onto their projects. We were ready for the final piece.
 with fish swimming to the left and one to the right. The students were instructed to draw (not trace-though some did just that) three fish, two going in one direction, one in the other. We talked about where to place the fish and I suggested the open space in the middle of their project. When the fish were drawn and colored properly, the students cut them out and then glued
  them onto their projects. We were ready for the final piece.
I cut large pieces of blue tissue paper out so that each piece would fit over the entire picture. The students prepared the surface of their work by brushing glue over all the white area first, the brown next, over the tops of the fish, and finally the green seaweed last (as it bled the worst). The blue was placed over the picture,  patted down (I did this part) and students applied another coat of glue over the whole thing. After the projects dried I cut them to about 11 x 8 so that all the edges were smooth (and they could fit on a 9x12 mounting). I trimmed the projects using paper cutter for a nice straight cut. At first I left a few kids do the trimming with scissors but their edges were so jagged I had to re-cut them myself. So I ended up doing it all. I know, a lot of work but I did it here and there while the kids worked on other things and honestly it went fast. The finished look made the extra work pay off. Finally, I have the kids glue their work onto a 9x12 black piece of construction paper. I had them use regular school glue (not stick glue) and then hold down the picture while slowly saying their ABC's.
 patted down (I did this part) and students applied another coat of glue over the whole thing. After the projects dried I cut them to about 11 x 8 so that all the edges were smooth (and they could fit on a 9x12 mounting). I trimmed the projects using paper cutter for a nice straight cut. At first I left a few kids do the trimming with scissors but their edges were so jagged I had to re-cut them myself. So I ended up doing it all. I know, a lot of work but I did it here and there while the kids worked on other things and honestly it went fast. The finished look made the extra work pay off. Finally, I have the kids glue their work onto a 9x12 black piece of construction paper. I had them use regular school glue (not stick glue) and then hold down the picture while slowly saying their ABC's.
The tissue gluing process was simple. I mixed 1/2 water with 1/2 glue and mixed it up well. I put those in paint cups, and the kids used that glue mixture for all their gluing in this project (except for the gluing of the project to the black paper, that was full strength glue).
 This was a whole group project with the purpose of giving the kids another example of how to make a collage and hopefully to inspire them to try to make other collage pictures on their own.
 I'd love to hear your thoughts.
Here are a couple of links of interest. I was trying to decide if this project fell under the definition of a decoupage. I think it better fits the collage definition. Here's some information that you might find helpful.
I stumbled on this wonderful site and thought I'd share.


