Friday, July 1, 2011

4th Grade Complementary Colors (Color Wheel)


Here's a project I did a few years ago.  Most kids really enjoyed the project but it did take far too long for some to finish.   I'm not sure I'd do it again as a whole group project but I would make it available as a center idea.  The reason I wouldn't repeat this whole group is due to the time it takes to complete the entire project.  It took several days from start to finish and in some cases, it took 4 class periods.  Maybe if I let the kids use markers instead of paint the process would speed up.  Also, it may look nicer in a 9x9 or 10x10 paper.

Steps we followed:
1.  Using a ruler and a pencil (drawing lightly), divide the paper into 6 parts (as per example)
2.  Students center their name (using pencil) in block lettering.
3.  Outline in black marker.
4.  Color each section as a color wheel.
5.  Color those parts of the letters that fall within the boundaries of a color wheel section the appropriate complementary color.
6.  Re-outline using black marker if necessary.
7,  Mount on construction paper.


I'm not sure where I got this idea.  Likely I found it on the Internet.  Here are three more examples.


Color Wheel

Here's a simple and fun way to get a color wheel into the hands of primary students.  The colored wheel can be found here and the black and white here.

Following introduction to the color wheel and discussing primary and secondary colors and how the color wheel works, I give the kiddies a little assignment.  They are each given a set of paints, water, brush, and plain paper.  I paint with them and demonstrate each step. I have them paint a picture using all six basic colors but they can only use the blue, yellow, and red from the tray.  They have to make their own secondary colors.  Colors are mixed right on the paper.

Students paint a purple butterfly, orange sun, green tree, blue sky, adding yellow and red in whatever way they want.  Here are a couple of paintings by the 1st graders.

This is just one of many ideas I use for teaching color theory.  I like this activity because I can complete the entire process in one 45 minute lesson.

One of the most popular centers in my classroom is the paint center.  Periodically, I only supply the center with the three primary colors and let the kids use painting trays for mixing.  After a few weeks I add the secondary colors and challenge the kids to create new and interesting colors.  I love the conversations that I hear at this center.

A good book to use to show color relationships is Mouse Paint.   

Next year I hope to make some primary color Playdough and give each student a Ziploc bag with two primary colors in each bag.  Then the kiddies can mix their colors and take home a secondary color.

Here's another lesson idea on the color wheel.  I would love to hear your ideas as well.


Wednesday, June 29, 2011

Tissue Paper Art

1st grader
 One of my students "stumbled" on this idea.  I had a model of a tissue collage on the white board but it had a white background and was mounted on black construction paper.  Not knowing the white background was necessary for the colors to be brighter, the student only used the black as a background.  Without the white background, the colors don't come through as brightly but the black background created a very interesting look.

2nd grader
The process I followed for this project is simple.  Students get a piece of construction paper (black) but I traced a black square (8x8) onto the larger black paper.

  I tell the kids to put their tissue paper within the traced boarder AND just beyond.  Using a paint brush to apply the glue (in decoupage fashion) once all the black within the square is covered, let it dry. 


3rd grade
Next, using the paper cutter, I cut the artwork into the 8x8 square leaving a very nice smooth edge to it.  That gets mounted on purple (leaving just a small edge) and that in turn gets mounted on black (again leaving a small edge).
4th grade
I press these using small individual white board and place a heavy object on top.  The way I pressed them was to just pile them one on top of the other with a white board separating each piece of artwork.  The pressing is necessary to flatten out the projects as the initial gluing warps the paper a bit.  But after pressing, the art projects lay perfectly flat.


5th grade
I hope this makes sense.
If not, please let me know and I'll clarify. 

Here is a small gallery of other examples of this project.

Saturday, May 14, 2011

Seasons Collage

Each day, during a 30 minute open slot, I meet with two 2nd graders and help them with their reading.  Their teacher explained to me that in their current story, the girls were struggling understanding the different aspects of seasonal changes (the order, names, and conditions etc).  This idea immediately popped into my head and I believe it's a great example how the arts can be used in a classroom to promote learning of difficult concepts.  Oddly enough, during the process of this project, I learned that the girls did indeed understand the concepts of seasons - the changes, order, colors, conditions, etc.  But working together on this project afforded us a lot of time to have a conversation about seasons.  We talked a lot about the colors of the seasons (which colors would best represent fall for example).  We found pictures from magazines and then used the "stuff" from the collage drawer.  Here is their work.  


5th grade theme collage


My example.  Note that in this initial
 example I did not include the
required background mounting.
This is another idea gleaned from the Donna Hugh Video Collection collection. I decided on this project for the 5th graders because I felt it would benefit them in some of their future classroom work (science posters for examples).  

My fifth-graders are an interesting group. They tend to do the least amount of work required unless their feet are held to the fire. Even some of my most skilled art students needed an extra push in this project. I had to get very specific with my expectations on their work.

The first group just slapped things together and I made them all begin again. Their initial work was sloppy and uncreative. It was very frustrating. I like to keep out of the way in the creative process but it was clear that I needed to be a bit more demanding in this case. And so in this case, I dictated certain elements that must be present in their work.  
They had to select a single theme and represent that theme with two pictures from a magazine. Those had to be mounted on construction paper and trimmed in an attractive way. One picture had to be placed on the left of the larger work, the other on the right.
We talked about balance, unity, material choice and placement, and using the space in their work to make it look attractive and inviting. I also talked about the effective use of line variety in their work and that the power of lines can invite the viewer to observe all aspects of an artwork. It was very much a hand's on approach and the results were very satisfying. After things were heading in the right direction, I was able to slip back into my facilitating role.  With very few exceptions, the students got serious about this project and did a great job. I was very impressed in the end.  Here are a few more examples.

Here's one I think is exemplary.  :)


Friday, May 13, 2011

4th grade collage

This is yet another idea from the Donna Hugh's Art Video collection. I mention her only to give proper credit for the idea. But as I have stated before in this blog, I really do like her art videos. They have helped me with new ideas and have inspired me toward new ideas of my own. From the website is this description:

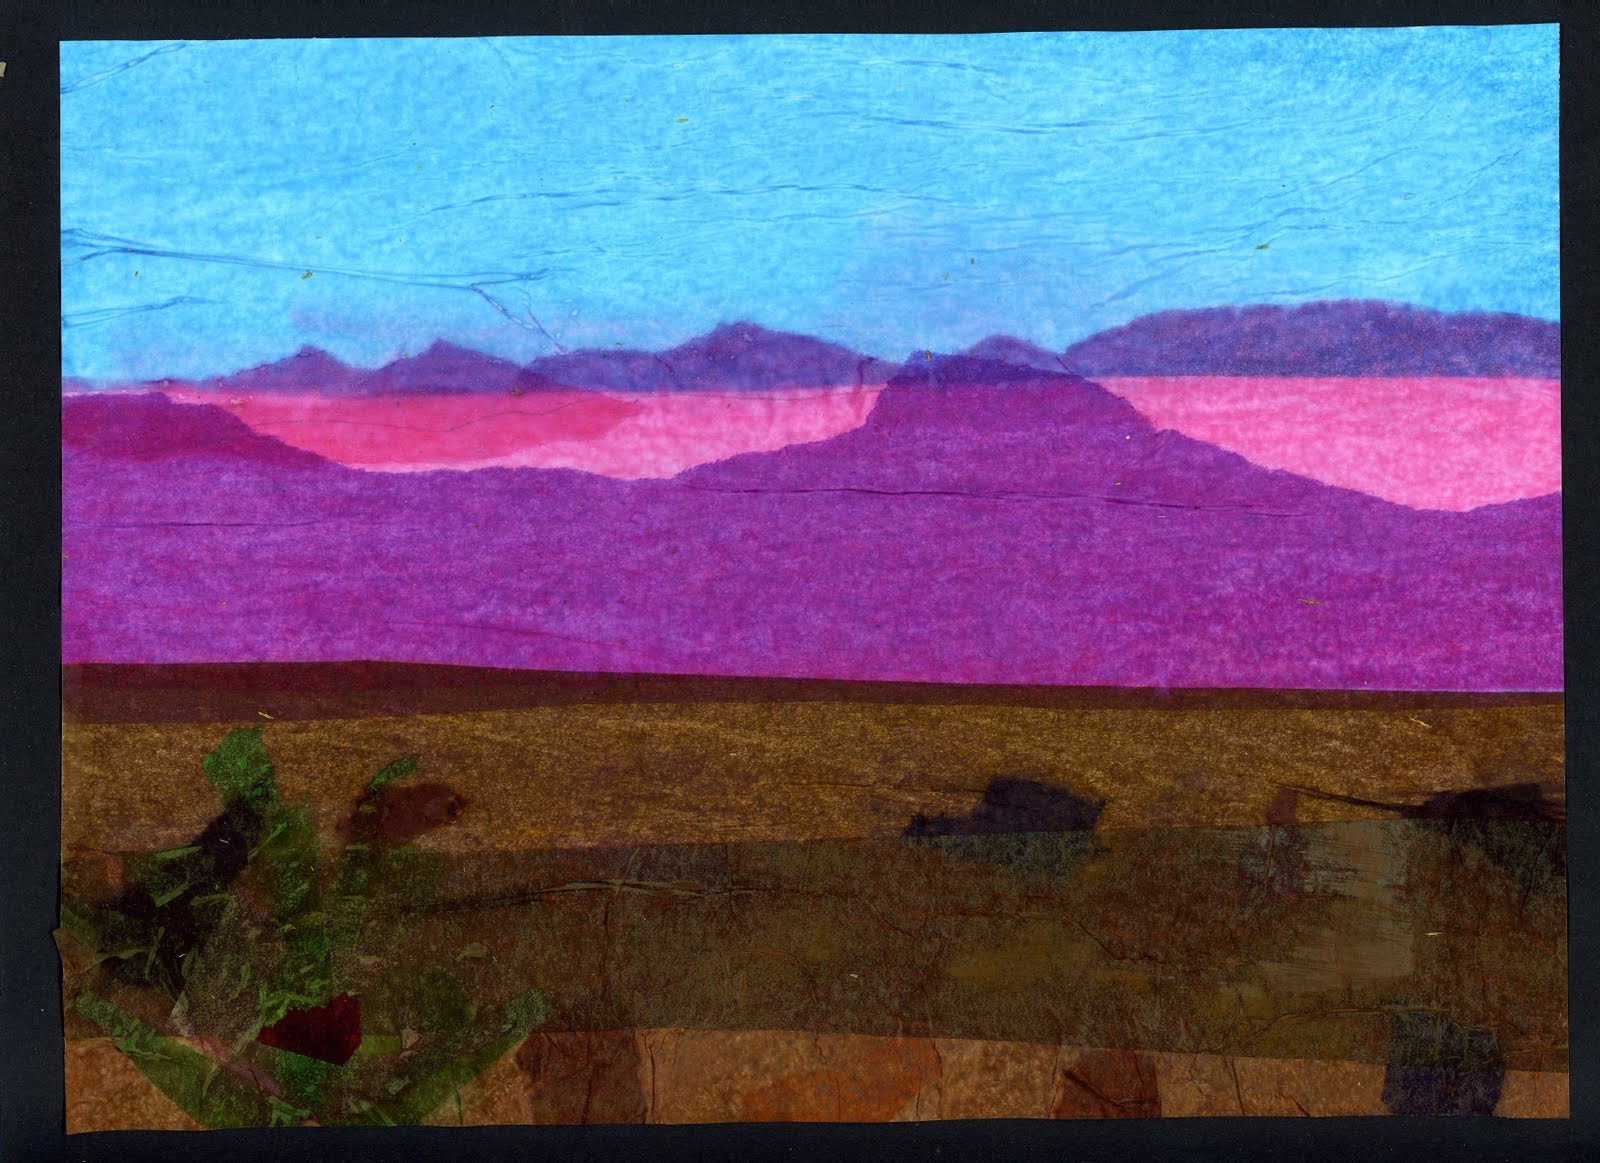
"In In Lesson 3, “Tissue Paper Collage,” Donna creates a desert scene by tearing colored tissue paper and affixing the pieces with very thin liquid glue. By layering and overlapping some of the paper, she shows how deeper hues and different colors can be achieved."


The best thing about his particular project was that it led to other ideas (which I'll share later.) I'll end with this last part. I had displayed my example on the board and a 1st grader decided that she'd like to make that same project. She's a great little artist and her is her interpretation. (on the right)

Saturday, April 9, 2011

Third Grade Tissue Paper Collage

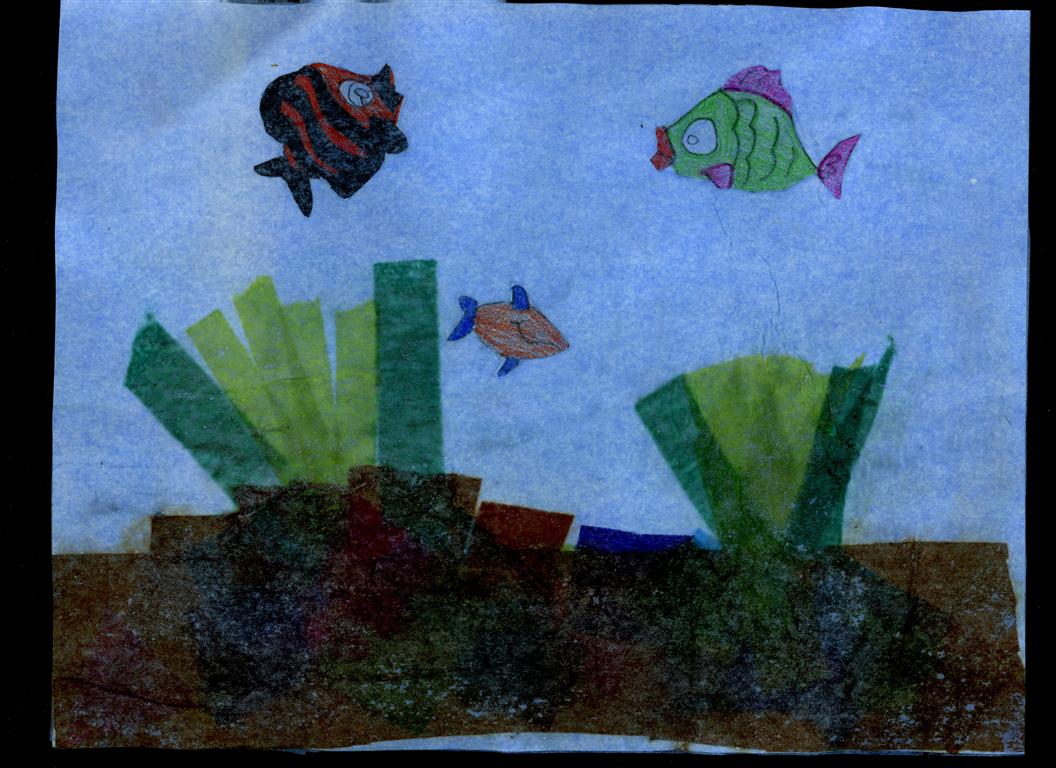
This project was a lot of fun. The kids really enjoyed it and so did I. The idea came from another collage project I was doing with the 4th graders. I love tropical fish scenes and this idea was both a fun and easy way to create a simple
underwater scene.
Starting with a white piece of paper, I had the students glue down different pieces of tissue paper (about the size of a dime - little torn pieces) at the bottom of the paper. They glued various colored pieces of tissue down to resemble the colorful coral. Then we covered that with a long strip of brown to represent the bottom. Doing this again, I'd add the colorful coral on the top of the brown and maybe even experiment with extending it above the top of the brown layer. We then added several strips of green tissue on both sides. Our pictures were ready for the fish.
One could go through magazines and find pictures of fish but it would be hit and miss. So I created two sheets of fish pictures, one with fish swimming to the left and one to the right. The students were instructed to draw (not trace-though some did just that) three fish, two going in one direction, one in the other. We talked about where to place the fish and I suggested the open space in the middle of their project. When the fish were drawn and colored properly, the students cut them out and then glued them onto their projects. We were ready for the final piece.
I cut large pieces of blue tissue paper out so that each piece would fit over the entire picture. The students prepared the surface of their work by brushing glue over all the white area first, the brown next, over the tops of the fish, and finally the green seaweed last (as it bled the worst). The blue was placed over the picture, patted down (I did this part) and students applied another coat of glue over the whole thing. After the projects dried I cut them to about 11 x 8 so that all the edges were smooth (and they could fit on a 9x12 mounting). I trimmed the projects using paper cutter for a nice straight cut. At first I left a few kids do the trimming with scissors but their edges were so jagged I had to re-cut them myself. So I ended up doing it all. I know, a lot of work but I did it here and there while the kids worked on other things and honestly it went fast. The finished look made the extra work pay off. Finally, I have the kids glue their work onto a 9x12 black piece of construction paper. I had them use regular school glue (not stick glue) and then hold down the picture while slowly saying their ABC's.
The tissue gluing process was simple. I mixed 1/2 water with 1/2 glue and mixed it up well. I put those in paint cups, and the kids used that glue mixture for all their gluing in this project (except for the gluing of the project to the black paper, that was full strength glue).
This was a whole group project with the purpose of giving the kids another example of how to make a collage and hopefully to inspire them to try to make other collage pictures on their own.
I'd love to hear your thoughts.
Here are a couple of links of interest. I was trying to decide if this project fell under the definition of a decoupage. I think it better fits the collage definition. Here's some information that you might find helpful.
I stumbled on this wonderful site and thought I'd share.